My Kindle Paperwhite is from 2013. I went back to reading paper books, so it was headed for a drawer. One night I asked Claude Code to turn it into a Stream Deck for my Mac. We jailbroke it together, step by step, and it wrote a little server for the Mac and a client for the Kindle.
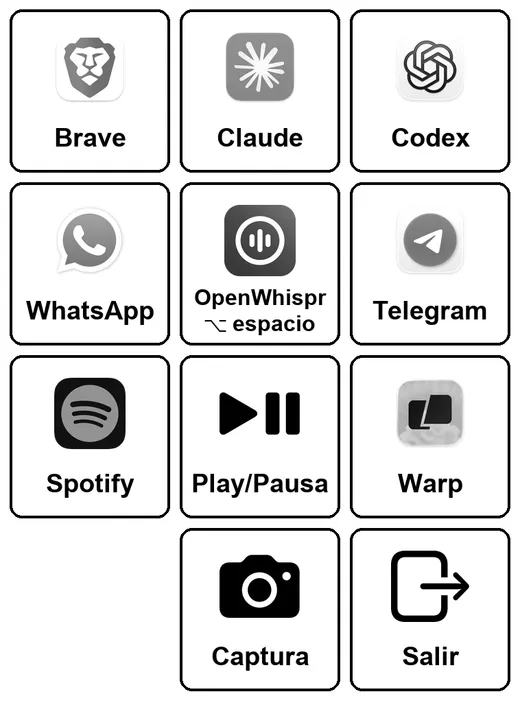
Now it sits next to my monitor opening apps, starting dictation and pausing the music, a blink after I tap it. This site is that prompt, so you can do the same with whatever screen you have lying around.
Enzo, Madrid
Any screen can be a Stream Deck.
That old Kindle in your drawer is a button panel for your computer now. Paste one prompt into Claude Code, Codex or Gemini CLI and your agent builds the whole thing: the panel, the buttons and the tiny server that runs them.
Built first on a Kindle Paperwhite 2 from 2013. About 200 ms from tap to app.
Go on, tap one. This Kindle is a demo; the real one runs a Mac.
One prompt. Your agent does the rest.
No app to install, no account, no subscription. Your coding agent builds it on your machine and explains every step before it takes it.
Pick your screen
A Kindle, an old iPad, a phone, a TV. If it has a screen and Wi-Fi, it's a candidate.
Paste the prompt
Into Claude Code, Codex, Gemini CLI or any agent that can run commands on your computer. It asks what you have, then builds it with you.
Tap
Open an app, press a shortcut, pause the music, switch the lights. Whatever you put on the buttons.
tap at 412, 690
Copy, paste, follow along.
The short version tells your agent to fetch the full recipe from this site, so it always gets the latest one. No web access? Copy the full version instead. Read it first if you like: it's plain English.
Turn my Kindle into a Stream Deck for this computer. Fetch https://streamdeckify.org/prompts/kindle.md and follow it step by step. Explain each step and ask me before changing anything.
Read the whole prompt first (12.3k characters)
# Streamdeckify: turn a Kindle into a Stream Deck
You are going to turn my Kindle into a touch panel of buttons (a "deck") for this computer. I tap a button on the Kindle and something happens here: an app opens, a shortcut is pressed, the music pauses.
This recipe is proven on a Kindle Paperwhite 2 (2013, firmware 5.12.2.1.1) driving a Mac mini and an Ubuntu PC, at about 200 ms from tap to action. Other Kindles should work the same way once they are jailbroken, but measure everything on mine instead of assuming.
## How it works (keep this design)
- The **computer** does the work. It draws the whole panel as one grayscale image at the Kindle's exact resolution, keeps the list of buttons and runs the actions.
- The **Kindle** is a dumb screen. It shows the image, reads raw touches and tells the computer where I tapped. It never decides what to run.
- They talk over my Wi-Fi with plain HTTP and a random token. The Kindle always starts the conversation (the computer never connects to the Kindle), so the Kindle's firewall can stay closed.
- The computer only runs actions from a fixed list in a config file. A tap sends coordinates, never commands.
## Ground rules
1. Go one step at a time. After each step, tell me what you found and what comes next.
2. Ask before you change the Kindle, install anything, open a firewall port or create a background service.
3. Never change privacy or security settings yourself. Tell me exactly what to click.
4. Everything stays on my local network: no cloud services, no accounts, no telemetry.
5. Back up the Kindle's storage before changing anything on it.
6. If something fails twice, stop, explain what you see and give me options. Don't guess in a loop.
7. Keep a README in the project folder and write down what you learn as you go.
## Start from the reference code
Don't write it from scratch. The code of the first deck, the Paperwhite 2 above, cleaned up for this recipe, is in the `reference/kindle/` folder of the Streamdeckify repo: the server, the Kindle client, a deploy script and the background services.
- Get it with `git clone --depth 1 https://github.com/enzovalley9/streamdeckify` in a temporary folder, and copy `reference/kindle/` to a project folder on my computer, like `~/streamdeckify`. Work in the copy.
- Read its README and the code before running anything, and tell me in a few lines what each part does.
- Adapt it to what you measure in Step 2. Its README lists what changes from one Kindle to another, and the code marks those places with `MEASURE`.
- Keep its design and its safety checks: the fixed list of actions, the token, the local network only. Write every change you make in the README.
## Step 0. What I have
Find out, and ask me only what you can't detect:
- My computer: OS and version, its IP on the Wi-Fi, and whether a firewall is on.
- The Kindle: when plugged in by USB it mounts as a drive on most models. Read `system/version.txt` for the firmware, and work out the model from the serial number (Settings > Device Options > Device Info). Tell me the model and generation.
- Back up the whole Kindle drive to a folder on my computer.
- Is it jailbroken? Signs: `documents/JAILBROKEN.txt`, or folders like `extensions/`, `koreader/` or `mrpackages/`.
**If it is not jailbroken:** open https://kindlemodding.org with me and find the current method for my exact model and firmware. Methods change every few months (in October 2026 a Paperwhite 2 on 5.12.2.x used WinterBreak2). I do the steps on the Kindle myself. You can read the official files and explain what each one does, but never download jailbreak files from anywhere else. Before we start, tell me the risks in one short paragraph and make sure the Kindle can't update itself halfway through. If I don't want to jailbreak, stop here and use the no-jailbreak recipe instead: https://streamdeckify.org/prompts/kindle-no-jailbreak.md
## Step 1. A shell on the Kindle
- Install KOReader for my model from its official GitHub releases and check the checksum. Besides being a great reader, it brings LuaJIT with FFI, an SSH server (dropbear) and FBInk. That's all we need on the Kindle.
- Get SSH working with key-only login: put my computer's public key in `koreader/settings/SSH/authorized_keys` and start KOReader's SSH server on port 2222 (from KOReader's menu, or with a launcher, below). Add a host alias `kindle` to my `~/.ssh/config`.
- Launchers: depending on the jailbreak, a shell script in `documents/` with a `# Name: ...` line at the top shows up in the library as a book and runs when I tap it (WinterBreak's scriptlets), or you write a KUAL extension. Make one called "SSH" that starts dropbear and prints the Kindle's IP on screen with `fbink`.
- Kindles ignore ping. Test the connection with TCP (ssh, nc), not ping.
Checkpoint: show me the output of `ssh kindle 'uname -a; df -h /mnt/us /var/local /'`.
## Step 2. Measure the Kindle (don't assume)
- Screen: `fbink -e` gives width, height, bits per pixel, rotation and dpi. Some FBInk builds have no image support (KOReader's often doesn't; the one that comes with the jailbreak usually does). Find one that can draw a PNG.
- Touch: find the touchscreen in `/proc/bus/input/devices` (an `/dev/input/eventN` with multitouch axes). Read its ranges and check whether they map 1:1 to pixels or are rotated or mirrored. The reference's `kindle/touch-test.lua` prints the ranges and every touch: run it with KOReader's LuaJIT and ask me to tap the four corners. Give me a long window, like 10 minutes: I will be slow.
- Software: see what's there (busybox, curl, lua, python). There's usually no Python. Use KOReader's LuaJIT for the client: through FFI it can do ioctl, poll and file IO.
- Free space on `/mnt/us`, `/var/local` and `/`.
Write all of this into the README.
## Step 3. The server on my computer
A small server in Python 3 (the standard library plus Pillow is enough, no web frameworks) that only answers my local network. Start from the reference's `server/deck_server.py` and one of the examples in `config/`, with the screen size you measured. It does this:
- `GET /health`: answers `ok` without the token, so the Kindle can check that the computer is there.
- `GET /layout`: plain text. First line, a version number. Then one line per button: `id x y w h type`.
- `GET /panel.png`: the whole panel at the Kindle's exact resolution, 8-bit grayscale, high contrast.
- `GET /tile/<id>?state=normal|pressed`: one button. Pressed is the same tile inverted.
- `POST /tap` with `x` and `y`: find the button, start its action in a background thread and answer straight away.
- Every other request needs an `X-Token` header with a random token stored in a file only I can read.
- Buttons live in `config/buttons.json`: a grid (on a 6" Kindle, 3 columns by 4 rows is comfortable), each button `{id, label, icon, type, value}`, and `null` for an empty cell. Reload the file when it changes and bump the layout version.
- Action types: `app` (open an app by name), `url`, `key` (a shortcut like `cmd+shift+3`), `shortcut` (macOS Shortcuts), `command` (an argument list, never a shell string), `media` (play/pause), plus `refresh` and `exit`, which the Kindle handles itself.
- Draw each tile as an icon with the label under it: bold text sized to fit, icons turned gray (on macOS, the app's own icon or an SF Symbol).
- Log every action and how long it took.
- Run it as a user service that starts at login and restarts if it dies (a launchd agent on macOS, `systemd --user` on Linux: the reference has both in `service/`). Ask me before installing it, and help me let it through the firewall.
- Optional but nice: answer UDP broadcasts on port 8788 so the Kindle finds the computer even if its IP changes. Have the Kindle send to my subnet's directed broadcast (like 192.168.1.255); 255.255.255.255 often doesn't arrive.
**macOS gotchas we already paid for**
- Pressing keys needs the Accessibility permission. Give it to a tiny helper app (a few lines of Swift that post CGEvents, signed ad hoc, like the reference's `macos/keys/`) that the server launches with `open`, not to Python. The Python that a launchd agent runs is often not the one listed in System Settings, and the permission silently doesn't apply. Rebuilding the helper changes its signature, so it needs the permission again.
- `screencapture` from a background service needs Screen Recording. Pressing cmd+shift+3 avoids that.
- AppleScript that controls another app (Spotify, a browser) shows an Automation prompt the first time. Warn me.
**Linux**: `xdotool` for keys, `gtk-launch` or `xdg-open` for apps, `playerctl` for media.
**Windows**: not tested yet. Propose something (PowerShell, AutoHotkey) and tell me it's new ground.
## Step 4. The client on the Kindle
Put it in `/mnt/us/streamdeckify/`: `deck.sh` (setup and cleanup) and `deck.lua` (the main loop, run with KOReader's LuaJIT). The reference's `kindle/` folder has both, and its `deploy.sh` copies them over SSH with a config file that holds the token.
`deck.sh`:
- Pause Amazon's interface so it neither draws over the panel nor reacts to taps. On the Paperwhite 2 that meant `killall -STOP awesome` and also `Xorg`: stopping only the window manager lets X clients repaint on top of the panel. Check what runs on my model before copying this.
- Keep the Kindle awake while the panel is open: `lipc-set-prop com.lab126.powerd preventScreenSaver 1`.
- On exit, always restore everything from a `trap`: continue the stopped processes, set preventScreenSaver back to 0 (if you forget, the power button stops putting it to sleep), repaint and go back to the home screen.
- If the Kindle's firewall blocks the discovery reply, open only that, and only while the deck runs: `iptables -I INPUT -i wlan0 -p udp --sport 8788 -j ACCEPT`, deleted again on exit with `-D`.
`deck.lua`:
- Fetch the layout and the panel, draw it, and cache every tile in both states.
- Open the touchscreen and take it over with the `EVIOCGRAB` ioctl, so Amazon's interface gets no taps. Parse multitouch type B events. A tap is the first finger lifting close to where it landed: a finger that moves is a swipe, and a second finger is ignored.
- On a tap: draw the pressed tile with a fast partial refresh (FBInk `-W DU`), send `POST /tap`, then draw the normal tile again.
- Ignore a second tap on the same button within half a second. Some touch controllers split one tap in two.
- Every 15 taps or so, do a full flashing refresh to clear the ghosting.
- Check `/layout` every 60 seconds and repaint if the version changed.
- `exit` ends the loop (and the trap restores the Kindle). `refresh` repaints everything.
Launcher: a book in `documents/` called **Deck** that starts `deck.sh`, made the same way as the SSH one (the reference's `kindle/launcher.sh`). Copy the client over SSH with the reference's `deploy.sh`, after asking me.
## Step 5. My buttons
Ask me what I want on it. Suggest a first grid for my system: browser, my AI app, terminal, chat, a dictation shortcut, music, play/pause, screenshot, lock screen and exit. Use the real app icons in gray when you can.
## Step 6. Test it with me
I tap every button while you watch the logs on both sides. Measure the time from tap to action (we got 170 to 240 ms for apps and shortcuts, a bit more for AppleScript; under 300 ms feels instant). Fix anything flaky before calling it done.
## Step 7. Hand it over
Finish the README: how to open and close the panel, add or move buttons, update the client, restart the server, and undo everything.
## Undo
Nothing here is permanent. Tap Exit or restart the Kindle to get Amazon's interface back. To remove it all, delete `/mnt/us/streamdeckify` and the launchers in `documents/`, and unload the service on the computer (on macOS, also remove the key helper from the Accessibility list). The jailbreak has its own uninstall steps on kindlemodding.org.
## When it works
Take a photo of it on your desk and add it to the wall at https://streamdeckify.org (or post it with #streamdeckify). If you learned something new about your model, add it to the device list with a pull request, along with any fix you made to the reference code: https://github.com/enzovalley9/streamdeckify
Turn my Kindle (without jailbreaking it) into a Stream Deck for this computer. Fetch https://streamdeckify.org/prompts/kindle-no-jailbreak.md and follow it step by step. Explain each step and ask me before changing anything.
Read the whole prompt first (5.3k characters)
# Streamdeckify: a Kindle deck without jailbreaking it
Status: experimental. Whatever happens, please tell us how it went (see the end).
You are going to turn my Kindle into a panel of buttons for this computer without installing anything on the Kindle. Its built-in web browser opens a page that this computer serves on my Wi-Fi, and each button on that page asks the computer to run one action.
It will be slower than the jailbroken version (the Kindle's browser is old) and the Kindle may fall asleep after a while. It's still a good panel, and nothing on the Kindle changes. The jailbroken recipe, if I change my mind: https://streamdeckify.org/prompts/kindle.md
## How it works (keep this design)
- The computer keeps the list of buttons and runs the actions, only from a fixed list in a config file. The page can only say "button 3 was pressed", never send a command.
- The page is served on my local network with a random token in its address. Nothing goes to the cloud.
## Ground rules
1. Go one step at a time. After each step, tell me what you found and what comes next.
2. Ask before you install anything, open a firewall port or create a background service.
3. Never change privacy or security settings yourself. Tell me exactly what to click.
4. Everything stays on my local network: no cloud services, no accounts, no telemetry.
5. If something fails twice, stop, explain what you see and give me options.
6. Keep a README in the project folder and write down what you learn as you go.
## Step 0. What I have
- My computer: OS and version, its IP on the Wi-Fi, and whether a firewall is on.
- The Kindle: model and firmware (Settings > Device Options > Device Info). Check that it has a web browser: on most Kindles it's called "Experimental Browser" or "Web Browser", in the menu or on the home screen. If mine has none, tell me and stop.
## Step 1. The server on my computer
A small Python 3 server, standard library only, listening on my LAN IP, port 8787:
- `GET /d/<token>/` serves the deck page. The token is random and goes in the address, because the Kindle's browser can't send custom headers reliably. Treat the full address like a password.
- `GET /d/<token>/tap/<id>` runs the action for that button and answers `204 No Content`, so the page doesn't navigate away.
- `GET /k`: a short address that redirects to the full one, answered only for devices on my LAN, so I don't have to type the token on the Kindle.
- Buttons live in `config/buttons.json` as a grid, each `{id, label, type, value}`.
- Action types: `app`, `url`, `key` (a shortcut), `shortcut` (macOS Shortcuts), `command` (an argument list, never a shell string), `media` (play/pause).
- On macOS, pressing keys needs the Accessibility permission. Give it to a tiny helper app (Swift, CGEvent, signed ad hoc) that the server launches, not to Python: the Python a background service runs is often not the one listed in System Settings. On Linux use `xdotool`, `xdg-open` and `playerctl`.
- Log every action and how long it took.
- Run it as a user service that starts at login. Ask me first, and help me let it through the firewall.
## Step 2. The page: an old browser on an e-ink screen
- Plain HTML and CSS, with a little inline JavaScript in ES5 only: no arrow functions, no `let` or `const`, no `fetch`, no Promises, no modules. Use `XMLHttpRequest`.
- Lay it out with a table or inline blocks (no CSS grid, careful with flexbox). Before designing, show me a test page that prints `window.innerWidth` and `window.innerHeight` so we size it for the real screen.
- Huge targets: 3 columns by 4 rows filling the screen. Black on white, thick borders, bold labels. No animations, no gradients, no web fonts, small images or none.
- Feedback: when I tap, invert the button at once, send the request, and put it back when the answer arrives. If it fails, show a short error on the button.
- Without JavaScript, every button should still work as a plain link.
- Avoid accidental text selection and zoom.
## Step 3. Keep it awake
On some firmware, typing `~ds` in the Kindle's search bar and pressing enter turns off the screensaver until the next restart. It doesn't work on every version: ask me to try it. If it doesn't, the Kindle will sleep after a few minutes and I'll wake it when I need it. Keep it plugged in either way.
## Step 4. Open it on the Kindle
Tell me exactly what to type in the Kindle's browser (the short address) and how to bookmark it. If the browser has a full screen or article mode, tell me how to turn it on.
## Step 5. My buttons
Ask me what I want. Suggest a first grid for my system: browser, my AI app, terminal, chat, music, play/pause, screenshot, lock screen.
## Step 6. Test it with me
I tap every button while you watch the log. Measure the time from tap to action and tell me (expect half a second to two seconds).
## Step 7. Hand it over
Finish the README: how to start and stop the server, add buttons and undo everything.
## Undo
Nothing changed on the Kindle. Delete the bookmark, then stop and remove the service on the computer.
## Tell us how it went
This recipe is still experimental. Open an issue with your Kindle model, firmware, what worked and what didn't: https://github.com/enzovalley9/streamdeckify/issues/new?template=add-device.yml
Turn my old screen into a Stream Deck for this computer. Fetch https://streamdeckify.org/prompts/any-screen.md and follow it step by step. Explain each step and ask me before changing anything.
Read the whole prompt first (6.9k characters)
# Streamdeckify: turn any screen into a Stream Deck
You are going to turn one of my old devices into a panel of buttons (a "deck") for this computer. I press a button on that device and something happens here: an app opens, a shortcut is pressed, the lights go on.
It works with anything that has a web browser (old iPads and iPhones, Android phones and tablets, e-readers, smart TVs, game consoles) or that can run code (a Raspberry Pi with a screen, a jailbroken e-reader, Android with Termux). Touchscreen or not: TVs have remotes, some e-readers have a 5-way pad, and everything takes a keyboard.
## How it works (keep this design)
- The computer keeps the list of buttons and runs the actions, only from a fixed list in a config file. The device can only say "button 3 was pressed", never send a command.
- The device shows the buttons and reports what I press.
- They talk over my Wi-Fi with a random token. Nothing goes to the cloud.
## Ground rules
1. Go one step at a time. After each step, tell me what you found and what comes next.
2. Ask before you change the device, install anything, open a firewall port or create a background service.
3. Never change privacy or security settings yourself, on the computer or the device. Tell me exactly what to click.
4. Everything stays on my local network: no cloud services, no accounts, no telemetry.
5. If something fails twice, stop, explain what you see and give me options.
6. Keep a README in the project folder and write down what you learn as you go.
## Step 0. Interview me
Ask one short question at a time, and suggest likely answers:
1. The device: brand, model, year, OS version, and which browser it has (or whether it can run code).
2. The screen: size, the orientation I want, e-ink or not.
3. How I press things on it: touch, a remote or D-pad, physical buttons, a keyboard.
4. Can it stay plugged in and awake?
5. My computer: OS and version.
6. What I want the buttons to do.
## Step 1. Pick the approach and tell me why
- **Browser deck** (the default): the computer serves a page and the device opens it. Works almost everywhere.
- **Native client**: if the device can run code and its browser is bad or missing (a jailbroken Kindle or Kobo, a Raspberry Pi, Termux on Android), a small client that draws the panel and reads input directly is faster. For Kindles there's a dedicated recipe: https://streamdeckify.org/prompts/kindle.md
- **An existing app**: if the device already runs something that can send an HTTP request when a button is pressed, we can skip the page. Only if it's genuinely simpler.
## Step 2. The server on my computer
A small server in Python 3 (standard library, plus Pillow only if you draw images), listening on my LAN IP:
- It serves the deck page (browser approach) and receives presses (`GET /d/<token>/tap/<id>` answering `204 No Content`, or `POST /tap` with a token header for native clients).
- Old browsers can't always send custom headers, so for pages put a random token in the address and treat that address like a password. Offer a short address (like `/k`) that redirects to it, answered only on my LAN.
- Buttons live in `config/buttons.json` as a grid, each `{id, label, icon, type, value}`. Action types: `app`, `url`, `key` (a shortcut like `cmd+shift+3`), `shortcut` (macOS Shortcuts), `command` (an argument list, never a shell string), `media` (play/pause), and `homeassistant` (call a Home Assistant service with a long-lived token stored on the computer) if I use it.
- Log every action and how long it took.
- Run it as a user service that starts at login and restarts if it dies (launchd on macOS, `systemd --user` on Linux, Task Scheduler on Windows). Ask me first, and help me let it through the firewall.
macOS gotchas: pressing keys needs the Accessibility permission, which should go to a tiny helper app (Swift, CGEvent, signed ad hoc) that the server launches, not to Python, because the Python a background service runs is often not the one listed in System Settings. `screencapture` from a service needs Screen Recording; pressing cmd+shift+3 doesn't. Controlling other apps with AppleScript shows an Automation prompt the first time.
Linux: `xdotool`, `xdg-open` or `gtk-launch`, `playerctl`. Windows: still new ground for this project, so say so and propose something (PowerShell, AutoHotkey).
## Step 3. The page, made for this device
Build it for the device I have, not for a modern laptop. First show me a test page that prints its CSS width, height, pixel ratio and user agent, and for non-touch devices the key codes it receives.
- **Old browsers** (Safari on iOS 9 to 12, e-reader browsers, old Android WebViews, TV browsers): ES5, `XMLHttpRequest`, no modules. Check each feature before you rely on it, and test on the device early.
- **Touch**: huge targets, an instant change on press (invert the button), no hover effects, `touch-action: manipulation` against double-tap zoom, no text selection.
- **No touch** (remote, D-pad, 5-way, keyboard): every button focusable, arrow keys move the focus around the grid like a TV menu, Enter or OK presses, a thick and obvious focus ring, and focus on the first button when the page loads. If the remote has number keys, map 1 to 9 to the first nine buttons.
- **E-ink**: pure black and white, no animations, no gradients, repaint as little as possible.
- **Full screen and awake**: a web app manifest so I can add it to the home screen (iOS, Android), kiosk mode or screen pinning (Android), the Screen Wake Lock API where it exists, and the device's own display settings otherwise. Tell me which settings to change; don't change them yourself.
- **Feedback**: show that the computer got the press, and show the error if it didn't. For live states (mic muted, music playing), poll every few seconds instead of holding connections open on old devices.
## Step 4. My buttons
Ask me what I want on it. Suggest a first grid for my system and for the size of the screen: browser, my AI app, terminal, chat, a dictation shortcut, music, play/pause, screenshot, lock screen.
## Step 5. Test it with me
I press every button while you watch the log. Measure the time from press to action and tell me. Fix anything flaky before calling it done.
## Step 6. Hand it over
Finish the README: how to open the deck on the device, add or move buttons, restart the server, and undo everything.
## Undo
Remove the bookmark or home screen icon on the device, then stop and remove the service on the computer. If you installed anything on the device, list how to remove it.
## When it works
Take a photo and add it to the wall at https://streamdeckify.org (or post it with #streamdeckify). Your device probably isn't on the list yet: add it with a pull request, so the next person with the same one gets it working in minutes: https://github.com/enzovalley9/streamdeckify
No touchscreen? Still a deck.
If you can point at a button and say "this one", it works. The prompt for other screens builds a panel you drive like a TV menu.
Touch
Kindles, tablets, phones, the screen in your car.
Remote
Arrows to move, OK to press. Smart TVs and consoles.
Buttons
A 5-way pad or page keys, like older Kindles and e-readers.
Keyboard
Number keys 1 to 9 press the buttons. Anything with keys works.
Screens that are decks now.
Each one is a page anyone can improve. Got it working on something new? Add it, and the next person with the same screen is done in minutes.
Wanted: be the first
All devicesKindle 4 or Kindle Keyboard
No touchscreen at all, just a 5-way pad. The perfect test for the non-touch idea.
I'll try itKobo with KOReader
Same e-ink, friendlier to hack. Probably half an hour with the Kindle recipe as a base.
I'll try itOld iPad (iOS 9 to 12)
Millions of them in drawers. Old Safari, big screen, perfect for 20 buttons.
I'll try itAndroid phone or tablet
Any version with a browser. Kiosk mode makes it feel like real hardware.
I'll try itAndroid TV or Google TV
Drive it from the sofa with the remote. No touch involved.
I'll try itRaspberry Pi with a screen
A touch display or a few physical buttons and a tiny screen.
I'll try itSteam Deck
A Steam Deck as a Stream Deck. Somebody has to do it.
I'll try itYour weird screen
A smart fridge, an old GPS, a car display. Surprise us.
I'll try itDecks in the wild.
Real panels on real desks. Built one? Put it up here.

Yours goes here
Add a photo with a pull request, or post it with #streamdeckify and we'll put it up for you.
Share your deckThe honest answers.
Is this the Elgato Stream Deck?
No. This is an independent, free project with nothing to do with Elgato or Corsair. "Stream Deck" is just the best way to describe what you end up with: a panel of buttons that make things happen on your computer. If you want the real one, it's great, go buy it.
Do I have to jailbreak my Kindle?
For the best result, yes: full screen and instant taps. Your agent walks you through it using the community's guides at kindlemodding.org, and you do the steps on the Kindle yourself. We never host jailbreak files. If you'd rather not, the no-jailbreak prompt uses the Kindle's own web browser. It's slower, but nothing on the Kindle changes.
Which AI agents work?
Any coding agent that can run commands on your computer: Claude Code, Codex, Gemini CLI and the like. The prompts are plain text, so you can read them before you paste them.
Is it safe?
Everything stays on your Wi-Fi. The screen only reports where you tapped; your computer runs actions from a fixed list that you approve, behind a random token. The prompts tell the agent to explain each step and ask before installing anything or touching settings. Still, it's your computer: read what the agent proposes.
What can a button do?
Open apps and websites, press keyboard shortcuts, play and pause music, start dictation, run a macOS Shortcut or a script, flip a Home Assistant scene, switch OBS scenes. If your computer can do it, a button can.
Will it break my device?
The deck itself is temporary: tap Exit or restart, and your device is back to normal. Jailbreaking carries some risk and can void your warranty, which is why the prompt backs up your Kindle first and sticks to the official community guides.
How much does it cost?
Nothing. It's MIT licensed. The only cost is whatever your AI agent charges you for the session.
This site is a pull request away.
Everything here lives on GitHub: the prompts, the device pages, the wall. Change something, open a pull request, and once it's merged the site updates by itself.